I made a Kubernetes game where you explore your cluster and destroy pods

a game where you can explore and destroy pods in your kubernetes cluster

I enjoy game development as a hobby on the side. I also enjoy working with container schedulers like Kubernetes. Over the weekend I decided to create a Kubernetes game, combining those two thoughts.

In the game you enter and explore nodes in your cluster, and can destroy your very own live, running pods. Hide prod away!

The game is put together using my engine of choice, Unity. With Unity you code using C#.
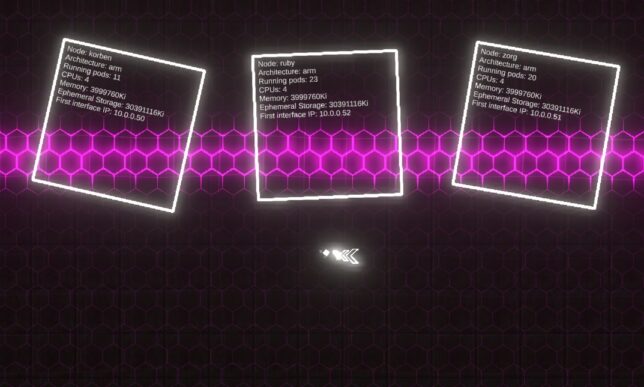
3 x Nodes represented in-game from my Raspberry Pi Kubernetes cluster.
3 x Nodes represented in-game from my Raspberry Pi Kubernetes cluster. Can you spot the naming convention from one of my favourite movies?

Game Logic

The game logic was simple to put together. I have a couple of modular systems I’ve already developed (and actually sell on the Unity Asset Store), so those made the movement and shooting logic, as well as background grid effects a breeze.

Movement is implemented in a simple ‘twin-stick’ controller Script (a Unity concept, which is a class implementing Monobehaviour).

Other game logic is mostly contained in the bullet pattern module. I have some more Scripts that arrange and control the Kubernetes entities as well as their labels.

The interaction with Kubernetes itself is fairly hacked together. I wanted to put the game together as quickly as possible as I only worked on it over a couple of weekend evenings.

Let the hacky code flow…

Unity is a bit behind in .NET Framework version support and .NET Core was out of the question. This meant using the Kubernetes csharp client was not going to happen easily (directly in Unity that is). It would have been my first choice otherwise.

With that in mind, I skipped over to a hacky solution of invocating the kubectl client directly from within the game.

The game code executes kubectlcommands on threads separate to the main game loop and returns the results formatted accordingly, back to the game’s main thread. I used System.Diagnostics.Process for this.

From there, game entities are instantiated and populated with info and labels. (E.g. the nodes and the pods).

pods spawned in the game, bouncing around

Pods have health

Pods are given health (hit points) and they simply bounce around after spawning in. You can chase after and shoot them, at which point a kubectl destroy pod command is actually sent to the Kube API via kubectl!

The game world

You enter the world in a ‘node’ view, where you can see all of your cluster’s nodes. From there you can approach nodes to have them slide open a ‘door’. Entering the door transports you ‘into’ the node, where you can start destroying pods at will.

For obvious reasons I limit the pods that are destroyable to a special ‘demo’ namespace.

Putting together the demo pods

I use a great little tool called arkade in my Kubernetes Pi cluster.

arkade makes it really simple to install apps into your cluster. Great for quick POCs and demos.

Arkade offers a small library of useful and well thought out apps that are simple to install. The CLI provides strongly-typed flags to install these apps (or any helm charts) in short, one-line operations.

It also handles the logic around figuring out which platform you’re running on, and pulling down the correct images for that platform (if supported). Super useful when you’re on ARM as you are with the Raspberry Pi.

Straight from the GitHub page, this is how simple it is to setup:

# Note: you can also run without `sudo` and move the binary yourself
curl -sLS https://dl.get-arkade.dev | sudo sh

arkade --help
ark --help  # a handy alias

# Windows users with Git Bash
curl -sLS https://dl.get-arkade.dev | sh

I then went about installing a bunch of apps and charts with arkade. For example:

arkade install loki --namespace demo

Hooking the game up to my Kube Cluster

With the demo namespace complete, and the application pods running, I needed to get my Windows machine running the game talking to my Pi Cluster (on another local network).

I have a Pi ‘router’ setup that is perfectly positioned for this. All that is required is to run a kube proxy on this, listening on 0.0.0.0 and accepting all hosts.

kubectl proxy --address='0.0.0.0' --port=8001 --accept-hosts='.*'

I setup a local kube config pointing to the router’s local IP address on the interface facing my Windows machine’s network, and switched context to that configuration.

From there, the game’s kubectl commands get sent to this context and traverse the proxy to hit the kube API.

Destroying pods sure does exercise those ReplicaSets!

ReplicaSets spinning up new pods as quickly as they're destroyed in-game!
ReplicaSets spinning up new pods as quickly as they’re destroyed in-game!

Source

If there is any interest, I would be happy to publish the (hacky) source for the main game logic and basic logic that sends the kubectl processes off to other threads.

This is post #5 in my effort towards 100DaysToOffload.

Cheap S3 Cloud Backup with BackBlaze B2

white and blue fiber optic cables in a FC storage switch

I’ve been constantly evolving my cloud backup strategies to find the ultimate cheap S3 cloud backup solution.

The reason for sticking to “S3” is because there are tons of cloud provided storage service implementations of the S3 API. Sticking to this means that one can generally use the same backup/restore scripts for just about any service.

The S3 client tooling available can of course be leveraged everywhere too (s3cmd, aws s3, etc…).

BackBlaze B2 gives you 10GB of storage free for a start. If you don’t have too much to backup you could get creative with lifecycle policies and stick within the 10GB free limit.

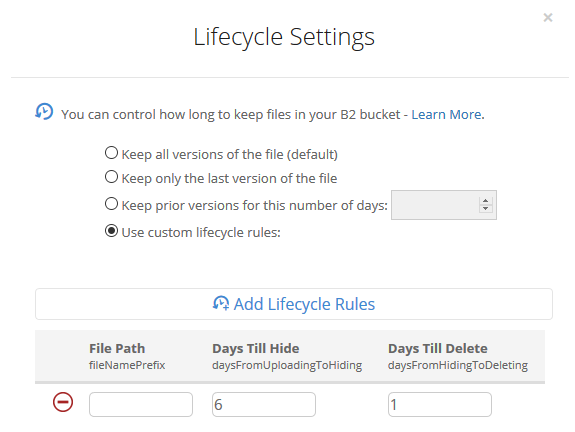
a lifecycle policy to delete objects older than 7 days.

Current Backup Solution

This is the current solution I’ve setup.

I have a bunch of files on a FreeNAS storage server that I need to backup daily and send to the cloud.

I’ve setup a private BackBlaze B2 bucket and applied a lifecycle policy that removes any files older than 7 days. (See example screenshot above).

I leveraged a FreeBSD jail to install my S3 client (s3cmd) tooling, and mount my storage to that jail. You can follow the steps below if you would like to setup something similar:

Step-by-step setup guide

Create a new jail.

Enable VNET, DHCP, and Auto-start. Mount the FreeNAS storage path you’re interested in backing up as read-only to the jail.

The first step in a clean/base jail is to get s3cmd compiled and installed, as well as gpg for encryption support. You can use portsnap to get everything downloaded and ready for compilation.

portsnap fetch
portsnap extract # skip this if you've already run extract before
portsnap update

cd /usr/ports/net/py-s3cmd/
make -DBATCH install clean
# Note -DBATCH will take all the defaults for the compile process and prevent tons of pop-up dialogs asking to choose. If you don't want defaults then leave this bit off.

# make install gpg for encryption support
cd /usr/ports/security/gnupg/ && make -DBATCH install clean

The compile and install process takes a number of minutes. Once complete, you should be able to run s3cmd –configure to set up your defaults.

For BackBlaze you’ll need to configure s3cmd to use a specific endpoint for your region. Here is a page that describes the settings you’ll need in addition to your access / secret key.

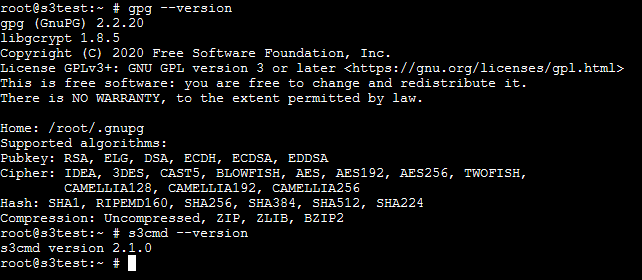
After gpg was compiled and installed you should find it under the path /usr/local/bin/gpg, so you can use this for your s3cmd configuration too.

Double check s3cmd and gpg are installed with simple version checks.

gpg --version
s3cmd --version
quick version checks of gpg and s3cmd

A simple backup shell script

Here is a quick and easy shell script to demonstrate compressing a directory path and all of it’s contents, then uploading it to a bucket with s3cmd.

DATESTAMP=$(date "+%Y-%m-%d")
TIMESTAMP=$(date "+%Y-%m-%d-%H-%M-%S")

tar --exclude='./some-optional-stuff-to-exclude' -zcvf "/root/$TIMESTAMP-backup.tgz" .
s3cmd put "$TIMESTAMP-backup.tgz" "s3://your-bucket-name-goes-here/$DATESTAMP/$TIMESTAMP-backup.tgz"

Scheduling the backup script is an easy task with crontab. Run crontab -e and then set up your desired schedule. For example, daily at 25 minutes past 1 in the morning:

25 1 * * * /root/backup-script.sh

My home S3 backup evolution

I’ve gone from using Amazon S3, to Digital Ocean Spaces, to where I am now with BackBlaze B2. BackBlaze is definitely the cheapest option I’ve found so far.

Amazon S3 is overkill for simple home cloud backup solutions (in my opinion). You can change to use infrequent access or even glacier tiered storage to get the pricing down, but you’re still not going to beat BackBlaze on pure storage pricing.

Digital Ocean Spaces was nice for a short while, but they have an annoying minimum charge of $5 per month just to use Spaces. This rules it out for me as I was hunting for the absolute cheapest option.

BackBlaze currently has very cheap storage costs for B2. Just $0.005 per GB and only $0.01 per GB of download (only really needed if you want to restore some backup files of course).

Concluding

You can of course get more technical and coerce a willing friend/family member to host a private S3 compatible storage service for you like Minio, but I doubt many would want to go to that level of effort.

So, if you’re looking for a cheap S3 cloud backup solution with minimal maintenance overhead, definitely consider the above.

This is post #4 in my effort towards 100DaysToOffload.
This blog runs on ARM microarchitecture

raspberry pi devices

Specifically, at any one point in time, this site is powered by one of a bunch of different ARM Cortex-A72 processors. In other words, it runs across a bunch of Raspberry Pi 4 devices.

There is a long history of where this blog has been hosted. Back in 2008 it was running in a virtual machine on a Dell OptiPlex PC.

Since then I’ve moved it to various hosting services, cloud services and such, until recently when I spun down my Digital Ocean Kubernetes cluster and migrated this site to my own personal Raspberry Pi Kubernetes cluster.

I don’t need anything powerful to run Shogan.tech. Most of my web traffic comes in steadily over the working week during typical working hours.

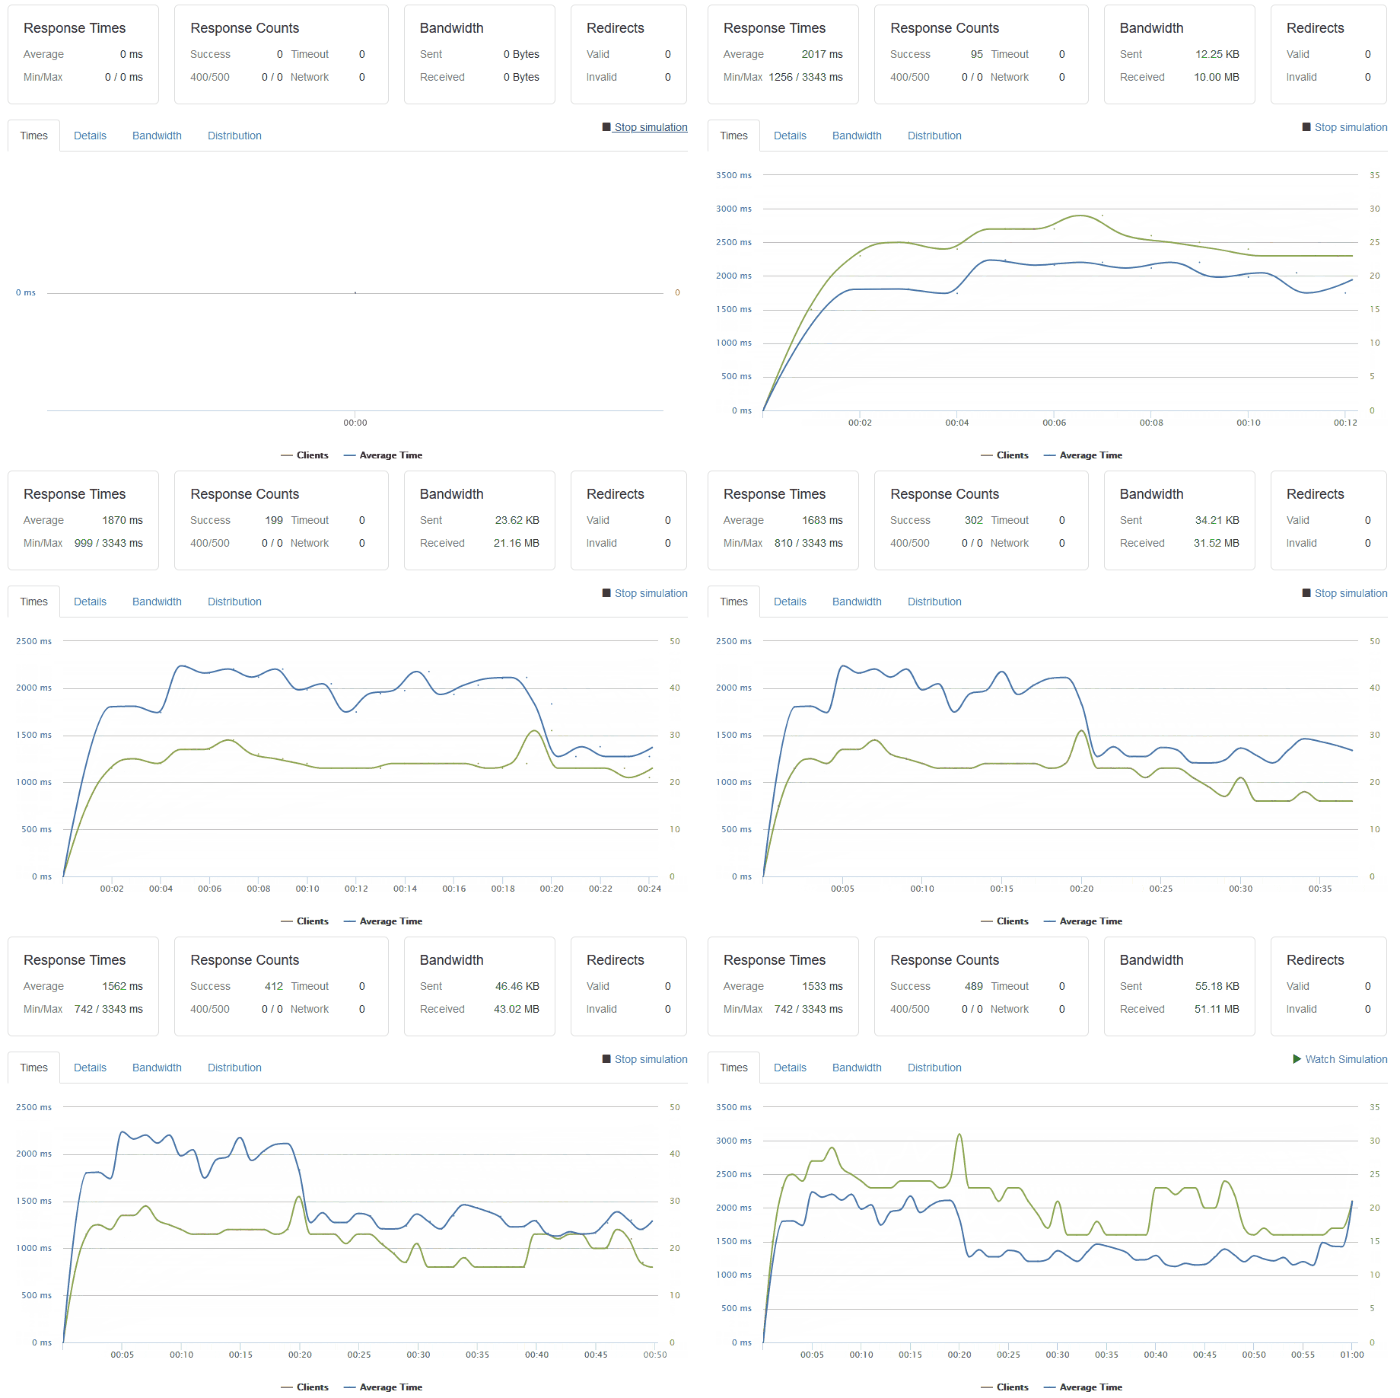
I have done some basic load testing though and the setup I have is capable of handling a few tens of clients per second, or as in this particular test, around 500 clients over 1 minute.

load test on this site with 500 clients over 1 minute making requests to the main page.

The response times may not be brilliant, but they’re OK. Especially considering the route a typical request/response takes:

  • A request hits my ‘outer’ router from the internet and goes through some firewall rules.
  • Then, the request enters my ‘inner’ network router and is routed over a WiFi link to a Raspberry Pi device running a bunch of iptables rules.
  • This Raspberry Pi ‘router’ directs the request through another physical network interface into my dedicated Raspberry Pi cluster.
  • The request hits an IP address being used as a software Load Balancer (Metal LB) where Kubernetes directs it to the backing NGINX ingress service (and hence pod).
  • The Ingress Controller figures out which pod to direct the request to and sends it there.
  • Finally the request hits the actual container running this site, and the software serves the response back to the requesting client.
  • Not to forget there is also a request to the database container that the web container makes too!

ARM technology for me personally has been great. I’ve been able to play with cheap hardware and come up with interesting use cases for it.

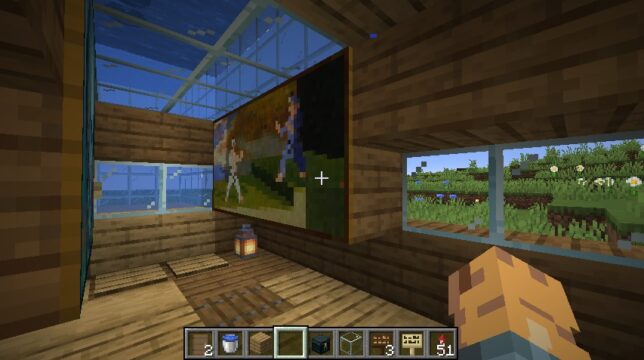
I’ve enjoyed hacking away on Raspberry Pi devices since 2013. I’ve used them for fun electronics projects, hosting bespoke servers for friends, playing Minecraft multiplayer with my kids, and more.

Playing Minecraft on a server running on Kubernetes with Raspberry Pi hardware

The future of computing with ARM

When I look back at this request/response lifecycle, I’m always impressed that a tiny Raspberry Pi board the size of a credit card is responsible for doing this.

To me, ARM architecture has seemingly been slowly changing the computing landscape over the last 5 years, accelerating in pace in the last year or so.

Let’s take a look at some notable cases of this:

Fugaku (Super computer)

Earlier this week’s big news in the super computing space was that Fugaku, a super computer built in Japan is now online.

This supercomputer is built with the Fujitsu A64FX microprocessor (which is based on ARM architecture).

Even though its not yet fully online, it leads the way with a peak performance of 0.54 exaFLOPS rated in the TOP500.

Microsoft Surface hardware

Microsoft have been making big moves within the ARM processor space. Here are some notable points:

Amazon AWS EC2 instances powered by ARM

AWS have started ramping up their own processor production with their Graviton chips.

These power newer generation EC2 instances and have allowed AWS to focus down on improvements that they know their customers will benefit from.

In a competitive cloud space, this gives AWS an advantage where they can design their own processors to deliver faster performance in key areas like compression, video encoding, machine learning, and more.

Another key advantage here is if you think about the plethora of recent Intel vulnerabilities that have been patched out and resulted in slower processor performance across various providers.

AWS can design their new chips with multi-tenancy and security as first class considerations. (Always-on 256-bit DRAM encryption etc…)

Apple macOS on ARM

Of course the big news the last couple of weeks has been Apple announcing they will be moving their Mac hardware over to ARM too.

In addition to longer term benefits they can realize with their own chip designs, this also allows them to unify their mobile and desktop ecosystem.

Soon users will be able to run their iOS and macOS apps on the same hardware.

It remains to be seen how the transition goes, but there is no doubt they’ll be breaking out Rosetta v2 to help support existing software on the new platform and ease the move from Intel to ARM for their customers.

Thoughts

Considering these examples of massive investments into ARM technology, I think there is certainly a big change coming to the CPU landscape in the near future.

For us consumers, more competition means better prices and more options. Cloud pricing will continue to reduce. But how will the software landscape change?

Software houses will certainly need to be on the ball and get their existing apps ready for ARM if they’re not already on it.

What about the future of x86? I personally can’t see the PC gaming market changing very soon. I love my Steam library collection of games. Those won’t work on ARM any time soon. The same goes for a lot of enterprise software.

So with cheaper hardware, decreasing power requirements, processors that are designed for specific workloads, and more competition across the board on the horizon, I have one closing thought.

As long as we don’t pay the price in performance loss for power efficiency, and we don’t end up with a massive chasm for software compatibility, I’ll be happy.

This is post #2 in my effort towards 100DaysToOffload.

AWS CodeBuild local with Docker

AWS have a handy post up that shows you how to get CodeBuild local by running it with Docker here.

Having a local CodeBuild environment available can be extremely useful. You can very quickly test your buildspec.yml files and build pipelines without having to go as far as push changes up to a remote repository or incurring AWS charges by running pipelines in the cloud.

I found a few extra useful bits and pieces whilst running a local CodeBuild setup myself and thought I would document them here, along with a summarised list of steps to get CodeBuild running locally yourself.

Get CodeBuild running locally

Start by cloning the CodeBuild Docker git repository.

git clone https://github.com/aws/aws-codebuild-docker-images.git

Now, locate the Dockerfile for the CodeBuild image you are interested in using. I wanted to use the ubuntu standard 3.0 image. i.e. ubuntu/standard/3.0/Dockerfile.

Edit the Dockerfile to remove the ENTRYPOINT directive at the end.

# Remove this -> ENTRYPOINT ["dockerd-entrypoint.sh"]

Now run a docker build in the relevant directory.

docker build -t aws/codebuild/standard:3.0 .

The image will take a while to build and once done will of course be available to run locally.

Now grab a copy of this codebuild_build.sh script and make it executable.

curl -O https://gist.githubusercontent.com/Shogan/05b38bce21941fd3a4eaf48a691e42af/raw/da96f71dc717eea8ba0b2ad6f97600ee93cc84e9/codebuild_build.sh
chmod +x ./codebuild_build.sh

Place the shell script in your local project directory (alongside your buildspec.yml file).

Now it’s as easy as running this shell script with a few parameters to get your build going locally. Just use the -i option to specify the local docker CodeBuild image you want to run.

./codebuild_build.sh -c -i aws/codebuild/standard:3.0 -a output

The following two options are the ones I found most useful:

  • -c – passes in AWS configuration and credentials from the local host. Super useful if your buildspec.yml needs access to your AWS resources (most likely it will).
  • -b – use a buildspec.yml file elsewhere. By default the script will look for buildspec.yml in the current directory. Override with this option.
  • -e – specify a file to use as environment variable mappings to pass in.

Testing it out

Here is a really simple buildspec.yml if you want to test this out quickly and don’t have your own handy. Save the below YAML as simple-buildspec.yml.

version: 0.2

phases:
  install:
    runtime-versions:
      java: openjdk11
    commands:
      - echo This is a test.
  pre_build:
    commands:
      - echo This is the pre_build step
  build:
    commands:
      - echo This is the build step
  post_build:
    commands:
      - bash -c "if [ /"$CODEBUILD_BUILD_SUCCEEDING/" == /"0/" ]; then exit 1; fi"
      - echo This is the post_build step
artifacts:
  files:
    - '**/*'
  base-directory: './'

Now just run:

./codebuild_build.sh -b simple-buildspec.yml -c -i aws/codebuild/standard:3.0 -a output /tmp

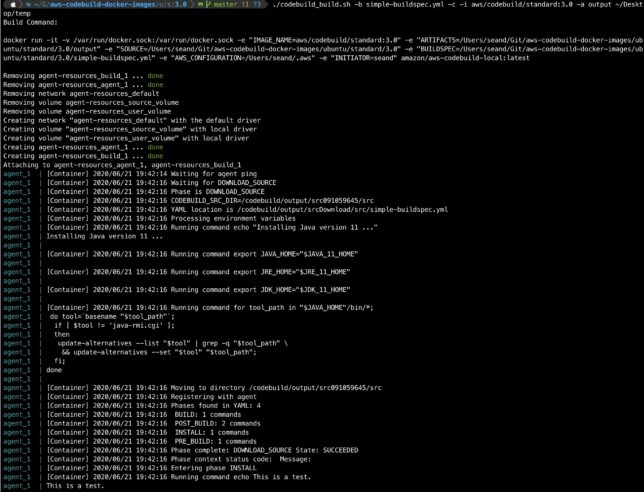
You should see the script start up the docker container from your local image and ‘CodeBuild’ will start executing your buildspec steps. If all goes well you’ll get an exit code of 0 at the end.

aws codebuild test run output from a local Docker container.

Good job!

This post contributes to my effort towards 100DaysToOffload.