DTrace/dtruss – an alternative to strace on macOS

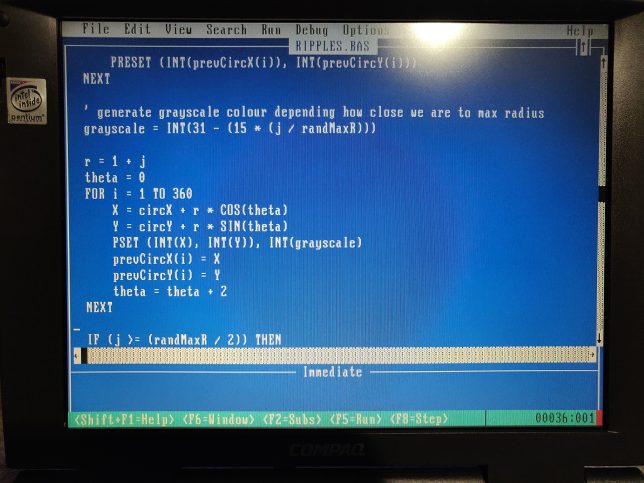
dtruss/DTrace output

If you’re on macOS and wanting to find out what system calls (syscalls) are being made by a process or application, you may have found that strace is not an option.

This is a quick post to demonstrate how to use DTrace to monitor system calls made by a process on macOS.

System Integrity Protection

First things first, you may find that newer mac systems have SIP (System Integrity Protection) enabled and that running dtruss will give you a warning about this. You’ll also likely not see much output at all.

It’s possible to disable this, but first be mindful of the security implications of disabling SIP, and second, be sure to set things back again once you’re done.

To disable SIP for DTrace, reboot your system into recovery mode (on my Apple M2 system I needed to shutdown completely, then power on, holding the button in until the recovery and startup options appeared).

Then I booted into the recovery tools, entered my usual user login, and used the menu bar at the top of the screen to open Utilities -> Terminal

Then ran:

csrutil enable --without dtrace

Tracing with DTrace/dtruss

dtruss is a DTrace version of truss, which is a Unix-specific command that prints out system calls made by a program.

We’ll use dtruss to see the syscalls made by a simple node application.

After this, a reboot back into the normal OS had me back at the terminal and ready to run dtruss.

Here’s a simple nodeJS program that we’ll trace.

const fs = require("fs");

const fd = fs.openSync("foo.txt", "r+");
fs.writeSync(fd, "foo", "utf8");
const test = fs.readFileSync("foo.txt");
console.log(test);

We load the fs module (used to make file operations), create a file descriptor pointing to existing file foo.txt in write mode, write the text “foo” to it, read it back by opening the file, and then write the result to stdout.

Let’s trace this program now.

sudo dtruss node example.js &> dtruss.log

Once that completes, you’ll see a lot of output detailing various system calls in the dtruss.log file. Much of this is made by the node environment itself, and a small part will be the actual example.js program. Scroll through until you find the part where the example.js script is loaded. It should start with

read(0x14, "const fs = require

Shortly after that you’ll see the syscalls made by the node program.

  • open (to open foo.txt)
  • write (to write the string ‘foo’ into the foo.txt file)
  • open (to again open foo.txt and read the content)
  • fstat64 which gets file status
  • write (with Buffer containing hexadecimal value for foo 66 6f 6f) to write the value to stdout.
read(0x14, "const fs = require(\"fs\");\n\nconst fd = fs.openSync(\"foo.txt\", \"r+\");\nfs.writeSync(fd, \"foo\", \"utf8\");\nconst test = fs.readFileSync(\"foo.txt\");\nconsole.log(test);\n\0", 0xA1)                = 161 0
close_nocancel(0x14)             = 0 0
open("foo.txt\0", 0x1000002, 0x0)                = 20 0
write(0x14, "foo\0", 0x3)                = 3 0
open("foo.txt\0", 0x1000000, 0x0)                = 21 0
fstat64(0x15, 0x16B814420, 0x0)          = 0 0
read(0x15, "foo\0", 0x3)                 = 3 0
close_nocancel(0x15)             = 0 0
ioctl(0x1, 0x4004667A, 0x16B813D4C)              = -1 Err#25
ioctl(0x1, 0x40487413, 0x16B813D50)              = -1 Err#25
fstat64(0x1, 0x16B813DC8, 0x0)           = 0 0
mprotect(0x109348000, 0x34000, 0x3)              = 0 0
madvise(0x109348000, 0x34000, 0x8)               = 0 0
mprotect(0x109348000, 0x34000, 0x5)              = 0 0
madvise(0x109348000, 0x34000, 0x8)               = 0 0
write(0x1, "<Buffer 66 6f 6f>\n\0", 0x12)                = 18 0
fstat64(0x0, 0x16B817520, 0x0)           = 0 0
fcntl(0x0, 0x3, 0x3C044618)              = 65538 0
__pthread_sigmask(0x1, 0x16B81751C, 0x0)                 = 0 0
ioctl(0x0, 0x80487414, 0x107D6D640)              = 0 0
__pthread_sigmask(0x2, 0x16B81751C, 0x0)                 = 0 0
fstat64(0x1, 0x16B817520, 0x0)           = 0 0
fcntl(0x1, 0x3, 0x3C044618)              = 65537 0
fstat64(0x2, 0x16B817520, 0x0)           = 0 0
fcntl(0x2, 0x3, 0x3C044618)              = 65537 0

Finally, don’t forget to reboot into recovery mode and set SIP back to the default.
Stand Reminder App – Remember to Stand

standing desk

I wanted a really simple stand reminder app in my system tray to remind me to stand up once in a while while working at my standing desk. (I started getting lazy and sitting most of the day instead of standing!) After trying a couple of apps on macOS, I didn’t have much success. One didn’t even pop up notifications or the selected sound effect, and the other one was paid only.

I thought I would just make a quick (and dirty) solution that worked for me using Rust.

Get the source and build your own copy here

Remember to Stand is a simple app run from the command line to remind you to stand up every now and then while working.

I’m no Rust expert but have been intrigued with the language, and hence decided to write a simple utility to remind myself to stand up every now and then at my desk.

If you don’t have a standing desk, you might want to use this to remind you to stand and take a walk around every now and then to stretch your legs.

The stand reminder app has a customisable time delay between the two different notification modes. It will pop up ‘toast’ notifications with a sound effect on each notification between standing and sitting mode.

When run, it will add a small icon in the system tray area (tested on macOS and uBuntu Linux 22.04).

Build

To build you’ll need to have the Rust tool chain with cargo installed. Compile into a single executable file with:

./make.sh build

Run

Once built, you can run the executable directly – e.g. `./target/debug/remember-to-stand`, or run directly from source with:

cargo run

Install

To install, build the app in release mode with:

./make.sh build --release

Then you can place the release executable in a convenient location. (For now you’ll need to copy the system tray icon and sound file to the same location too – copy from the ./resources or the target build directory to the same path that you place the executable in)

Configure

The app will automatically create a default configuration file in your user home path: ~/.remembertostand. You can edit this file to change the notification title text messages and customise the time delays between sitting and standing modes.

For example:

{
    "config": {
        "customstandmsg": "Stand up",
        "standtimesecs": "3600",
        "sittimesecs": "3600",
        "customsitmsg": "Sit down"
    }
}

I have not tested the app much more than my own system running macOS 12.4 (Montery), but given that its written in Rust it should be fairly portable.

I have tested the toast notifications on a linux system with gnome desktop, so I know that at least that component should work on that environment.

Give it a quick try by building with Rust for own system if you need something simple like I did for stand up reminders.

Vim Cheatsheet

vim cheatsheet feature

A quick vim cheatsheet for those of us who enjoy using vim, but don’t use it often enough to have the command sequences committed to memory.

Starting with the simplest operations, and then moving on to a few more complex and difficult to remember ones.

Remember that you always start in normal/visual mode. To enter insert mode to start entering text, you can use i or I.

  • Quit without saving: :q!
  • Quit and write changes: :wq
  • Enter insert mode at beginning or end of current line: I
  • Enter insert mode at the current position of the cursor: i
  • Escape current mode: Esc
  • Search forward for text pattern: /text
  • Search backward for text pattern: ?text
  • Go to bottom of page: G
  • Go to top of page: gg

Copy/paste style vim operations:

  • Copy and line (yank): yy
  • Paste a ‘yanked’ line: p (after) or P (before) cursor.
  • Delete character before cursor: X and after cursor: x
  • Delete current line: dd
  • Delete current line and start insert mode: cc

Deleting

  • Delete all lines in file: ddgD

Sorting

  • Sort all lines (no range): :sort
  • Sort all lines (no range, reversed): :sort!
  • Add options to the sort command:
    • i – ignore case
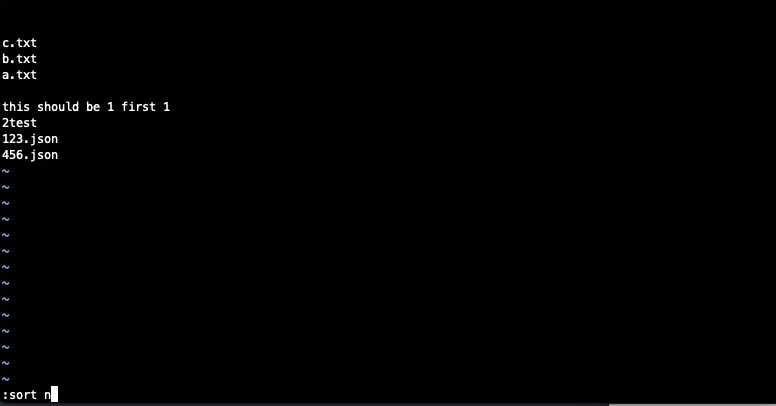
    • n – sort based on the first decimal on the line
    • f – sort based on the first float on the line

Some useful, yet more arcane vim operations:

  • Clear all lines in a file (1 is the first line, $ is the last line, and d is delete): :1,$d
  • Insert the result of Vimscript expressions into your file:
    • Enter Vim’s command line: Enter INSERT mode, and type CTRL + R =
    • Type a Vimscript expression, for example system("ls") and press ENTER
    • The output of the command ls will be inserted into the buffer.

Example of the above vimscript expression register result insert:

This of course only scratches the surface of the surface of what can be done. It’s just a quick little vim cheatsheet that I’ll refer back to when I get a little rusty.

The advanced or more arcane commands are the useful ones that I tend to forget when I’m not using them on a daily basis. I’ll certainly be recalling this post and updating those with new ones that I find useful in the future.

error TS2582: Missing types in a TypeScript project

This is a quick note as a pointer to anyone running into type errors like error TS2582. You might be working with Jest, TypeScript, and a monorepo setup, using something like lerna. I was porting over some projects into a monorepo and had a tsconfig.json issue which was cause for this error. You might be seeing errors similar to: error TS2582: Cannot find name 'test'. Do you need to install type definitions for a test runner? Try npm i --save-dev @types/jest or npm i --save-dev @types/mocha.

As it turns out, my issue was that I had a tsconfig.json file with typeRoots configured to point to the package’s own node_modules directory. Like this:

{
  "compilerOptions": {
    "...": "...",
    "typeRoots": ["./node_modules/@types"]
}

As this was a monorepo, common types such as those from jest were installed in the repository root. Meaning a package tsconfig.json file under package/example-package, referencing the location of “./node_modules/@types” was incorrect.

The fix was to simply remove the typeRoots setting from the package, or change it to point a further level down to the root: “../../node_modules/@types“.

To quote the docs on typeRoots, if you explicitly set typeRoots, then you’re narrowing down the locations that these will be pulled in from (compared to the default of not setting them).

By default all visible@types” packages are included in your compilation. Packages in node_modules/@types of any enclosing folder are considered visible. For example, that means packages within ./node_modules/@types/, ../node_modules/@types/, ../../node_modules/@types/, and so on.

TypeScript TSConfig Reference

Making a Retro Screensaver in QBasic

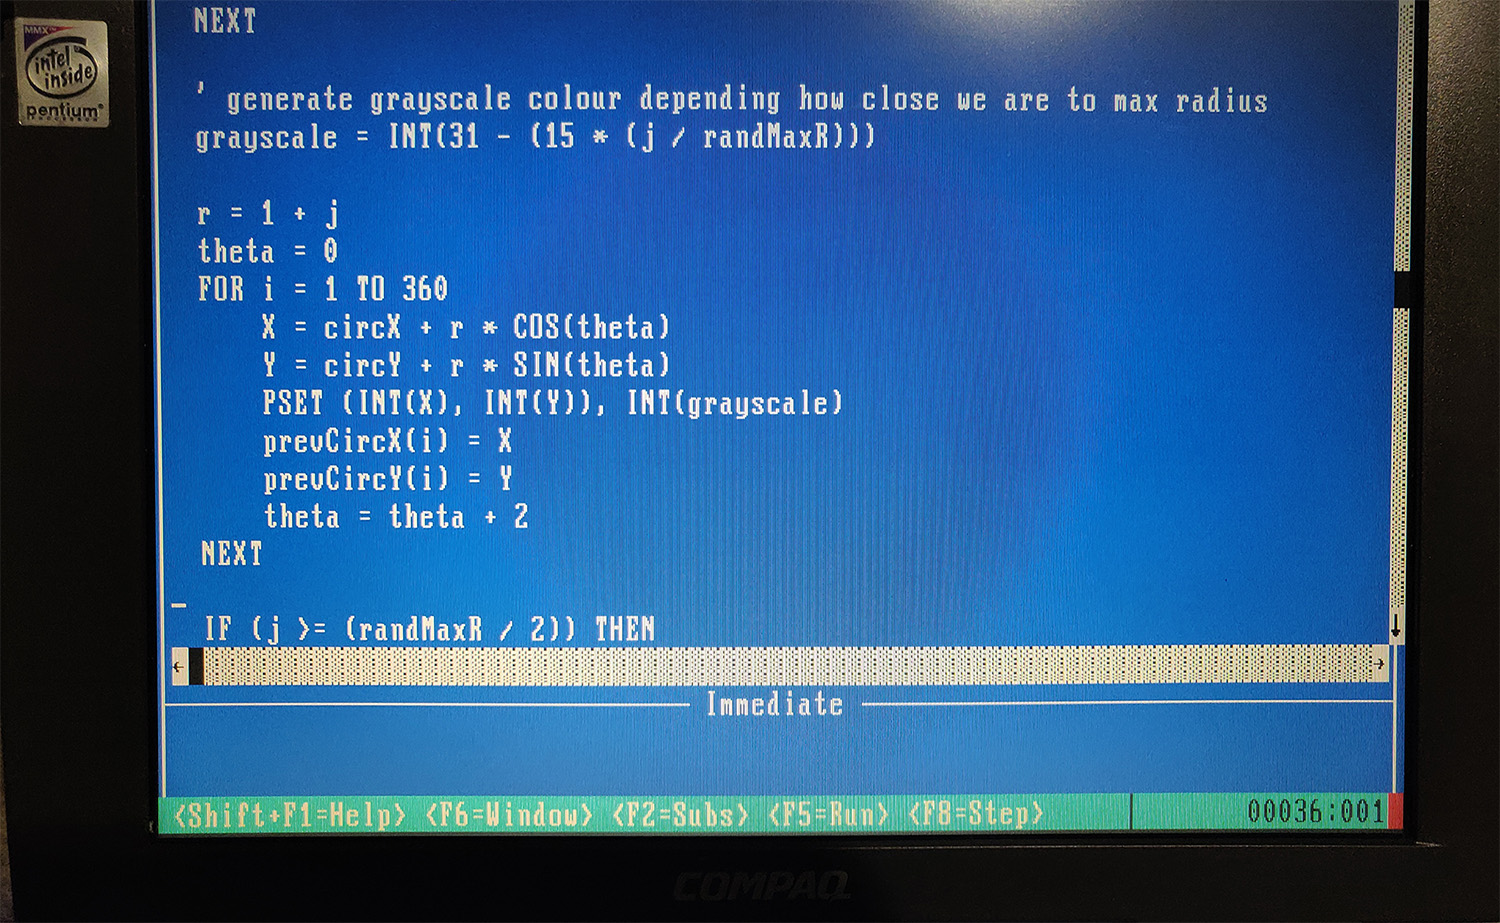
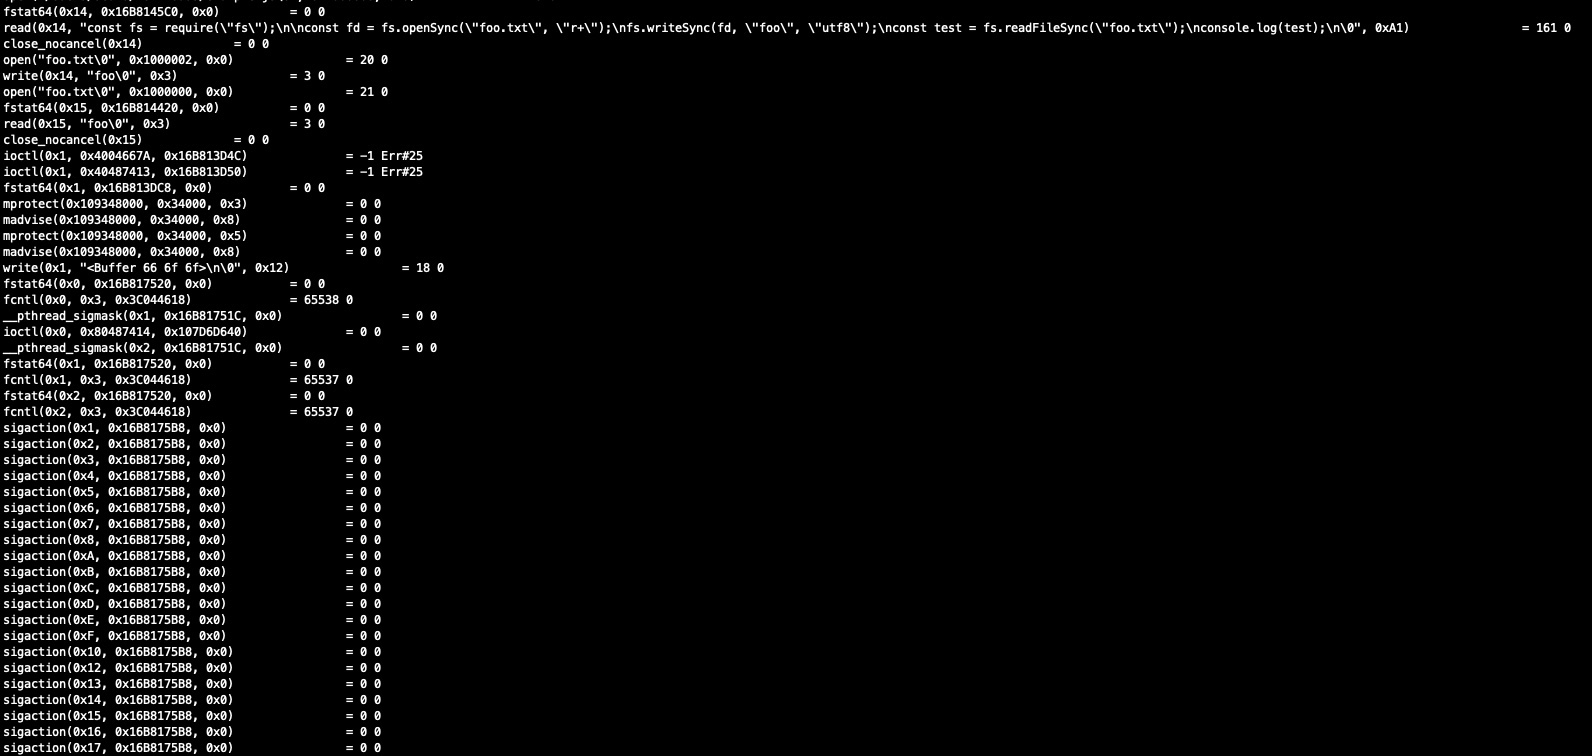
qbasic IDE

I recently had a wave of nostalgia which led to my purchase of an old Pentium Compaq Armada 1592DT Notebook, (and also building an AMD K6-2 gaming PC, complete with a 3dfx Voodoo 2!) Continuing this journey, I decided to revisit a small part of my childhood – programming with QBasic on DOS.

My first steps in programming as a child were with QBasic on an older 486 system that only had DOS 6.22 and Windows 3.1. A group of friends and I discovered QBasic (probably via a bunch of old paper manuals that came with our parent’s PCs) and began writing primitive programs that would prompt for input, save the answer in variables and lead the user through a series of questions, printing out answers in return.

For fun, I decided to look into the effort required to write a simple screen saver (remember those) using QBasic. It turns out there is not much effort required at all.

QBasic on a Modern System

The easiest approach is to use DOSBox. I installed it on my Windows 10 machine. From there, I configured it using the DOSBox configuration file to run in a larger sized window. It is as simple as adding this to the .conf file:

windowresolution=1920x1080
output=ddraw

Next, I setup automatic mounting of a “DOS Apps” folder I setup on my D: drive. Locate the [autoexec] section in the DOSBox conf file and add something like this:

mount C D:\Tools\DOS_APPS
C:
cd QB45
qb.exe

This will mount everything under D:\Tools\DOS_APPS to the C:\ drive of your DOSBox machine. It then changes directory to the contained QB45 directory to run the QBasic executable.

Ripples, The Retro QBasic Screensaver

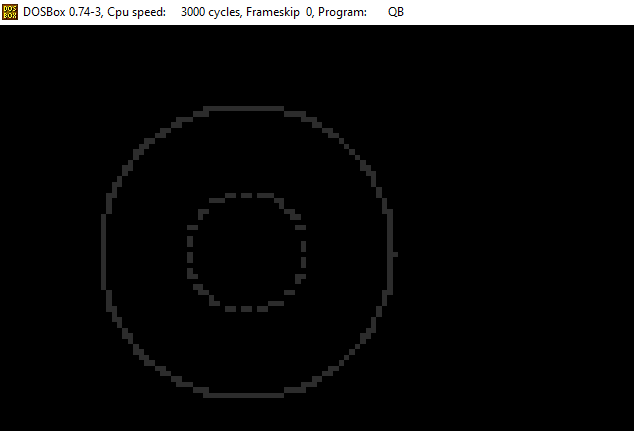
a simple screensaver written in QBasic

I wrote a simple SCREEN 13 mode (320×200 VGA) screensaver that I named Ripples. It simply draws outer and inner circles which expand and fade out at random locations. I’ve used a basic circle drawing algorithm, and POKE to set values at specific locations in memory. (In SCREEN 13 mode, each pixel is represented by 1 byte).

The reason I didn’t use the much simpler CIRCLE routine, is because I wanted to have multiple circles drawn out (inner loops) and also prevent screen clears after every concentric circle. (Also, the added complexity of the circle creation routine itself was fun to add).

You can take a look at the quickly hacked together source code here. I’m sure there are far more efficient ways of doing some of these things, but I didn’t want to spend too long digging deep into screen drawing. (Maybe using DATA could improve things, or perhaps even writing inline machine code to perform the loops and pixel setting that POKE does).

Running it on an actual Retro System

I copied QBasic and the source code across to my actual retro system (the old Pentium laptop).

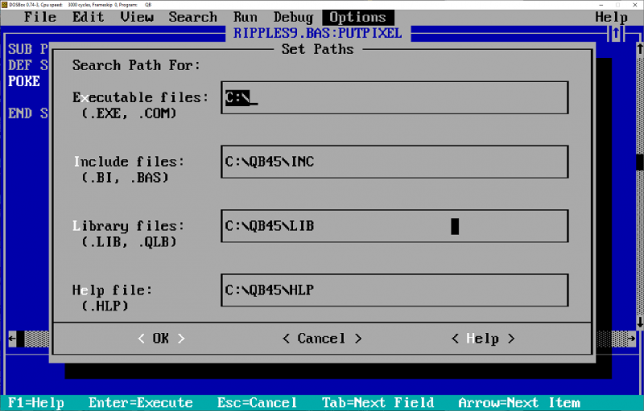
Next I configured QBasic to be able to use a linker to compile an executable. It’s a case of simply ensuring your Paths are set correctly under Options.

qbasic paths options

I opened and compiled the source, disabling debug symbols to vastly improve speed too. Windows 98 has a DOS mode built-in that can execute DOS applications directly from Windows. QBasic and the program ran perfectly like this. After booting into MS-DOS mode I confirmed that the compiled source ran perfectly there too.

This was a mostly pointless exercise, other than to experience a bit of nostalgia. It certainly was a blast from the past. The experience also helps me to appreciate the modern tooling and IDEs we use today. Having said that though, I did find myself quickly iterating through edits in QBasic using the edit and search options. It wasn’t too bad after all.